Friday, February 28, 2014

Paleo breakfast meatloaf


A little paleo update for you all! 

Yesterday I made some yummy meat treats, which kinda sounds gross but they were delicious.
The first came from a recepie in my paleo book, it is an breakfast meatloaf. 
 Firstly you start with 1 1/2 lbs of ground beef or pork if you choose, blend it together with various herbs and spices. I used fresh garlic, salt, pepper, and paprika. 
Next in your loaf pan line it with parchment paper and place a small amount of the meat in the bottom of The pan. 
I was only able to fit 5 hard boiled eggs in but you can choose however many you would like, but line then up in there. 
Next cover the eggs up with the rest of the meat.

Bake at 400 for 35 minutes, slice up and enjoy!!! 

Now I had some meat left over, so I decided to make some yummy paleo meatballs!
I used about a little over a pound of ground beef, again garlic, salt and pepper, also I added fresh green onion my favorite. Baked them at 400 for about 20 min or so. They are super good! 


Happy paleo cooking everyone!!!


Saturday, February 15, 2014

Pale-oh?

Haven't been posting lately due to mainly I've been an absolute grumpy pants. Nothing in my life is going right And generally it all sucks. I try to be a silver linings kinda girl but sometimes it all just piles up on ya. 

Recently friends of ours invited us to take a small trip with them...to VEGAS!
Well in an effort to get ourselves healthier, happier and Vegas ready the hubby and I decided were gonna try a 30 Paleo diet. We picked up one of many many books at Barnes and noble.
This one looked easy enough to follow and plans out 30 days of Paleo breakfast lunch and dinner, along with a shopping list for each week.
We figured why not give it a try! 30 days can't hurt. 
There are already going to be a few hiccups in the plan- going to Vermont for a few days as a belated anniversary trip (includes the Ben and Jerry's, and Cabot factories defiantly not Paleo) but we're gonna give it the ole collage try! 

I will make my best effort to keep this blog updated with our efforts!! 

Tuesday, January 21, 2014

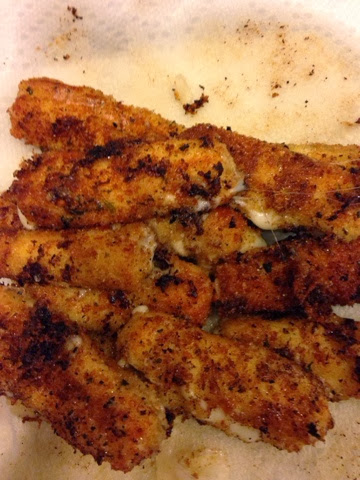
Home Made Mozzarella Sticks

Home Made Mozzarella Sticks Have you ever just been minding your own business at home, all comfy in your PJs, and then all of a sudden you get that rumble in your tummy that only restaurant style mozzarella stick can satisfy?

 Ok, maybe it’s only me that this happens to, but if you are like me and you suffer from this as well, boy do I have a recipe for you! 

Once again found on pinterest at one point here is how to make some easy mozzarella sticks! 

Take Mozzarella cheese sticks and cut them all in half.
 Roll them in flour 

Then roll them in egg 


Next roll them in bread crumbs 

Put them in the freezer for about half an hour, this way the cheese won’t melt immediately when you fry them up! 

After freezing, fry them up in some cooking oil and enjoy!!

You may notice that the oil looked a little funny, which is because it was bacon grease. We had just made bacon and well being the fatty Americans that we are we figured hey why not?!
Not going to lie, they tasted like heaven, I think mostly because of the bacon grease.

Well enjoy!

DIY cute anniversary or wedding present.

A few months back I made a cute little inexpensive anniversary present for two of my very best friends. 

Found on Pinterest here... 

I totally loved it and since It was so quick and easy looking I went right to work!

I found a cute frame at the dollar store along with the spoons (one set of 2 for $1) 
I had the background paper from an earlier project as well as the letter stamps and ink. 
I hot glued it all together and I think it came out pretty cute!

Thankfully I remembered they started dating around the same time as my hubby and I! So I made one for us while I was at it. It's super cute to put in the kitchen. Pretty great when your friends keep similar anniversaries to you, makes it all easy to remember! 

Anyway, I would like to make nicer ones eventually if I can find better frames and cool looking spoons. But you can't beat that for $2!!

Happy crafting everyone!!

Sunday, January 19, 2014

Pumpkin muffins and potato wedges!

My father recently had hernia surgery, so on Friday I went down to my parents to spend the day with him keeping him company. While I was there my sister told me to make healthy muffins and supplied me with pumpkin, organic honey, and coconut oil. I went immediately to my trusty ole Pinterest to see what I could find and created these yummy treats! 
 I used the recepie from this lovely blog http://www.hungryhealthygirl.com/2012/10/16/thebesthealthypumpkinmuffins/

Made with whole wheat flour they are pretty solid and heavy but still pretty dang yummy!!

Later that night I helped my mother with dinner, found another awesome recepie on Pinterest for potato wedges from this blog 

http://natashaskitchen.com/2013/01/18/oven-baked-potato-wedges/


They were super tastey! And went well with the burgers my mom made 


Well that's all for now! Happy baking/cooking!!!

Tuesday, January 14, 2014

Spaghetti Pie

I wanted to share an old family recipe with all of you! 

 And when I say old family recipe, I really mean we ate this almost every week growing up and it is still a quick easy staple for my family. 

 As you may have guessed it’s called spaghetti pie! This dish is very similar to lasagna, but way easier/quicker to make, and it’s from a weight watchers recipe so you could say it’s even better for you!


You need… 2 cups cooked spaghetti 
 1 oz. grated parmesan cheese 
 1 egg beaten 
 1 tablespoon margarine 
 1 jar spaghetti sauce 
 1 container of Ricotta cheese 
 Some mozzarella cheese 

 Mix in a large bowl together the Spaghetti, Parmesan cheese, Egg, and Margarine. Spread into a pre-greased glass pan. Scoop Ricotta in big spoonful’s over the mix, covering the whole thing. Pour the Spaghetti sauce over the top. (I add cooked ground beef to my sauce; you can add anything you want, meat, veggies or whatever!) Bake at 350 for 20 min, top with mozzarella cheese and bake for another 15 min. Take out of oven, let sit for 10-15 min and enjoy! 

 I like to let mine sit for a bit so it stays together, when it’s hot it tends to fall apart, so if you want it to look presentable on your plate before you devour it, let it sit. 

 Well there you have it! Happy cooking everyone!

Monday, January 6, 2014

Setting up for a healthy life.

Along with trying to orgnize my life I'm trying to get back on the healthy eating fitness track. So to start off my first work week right I decided to make some breakfasts and snacks for the week.

 My sister let us borrow this cart her, which ive decided to set up as a to go table of sorts.

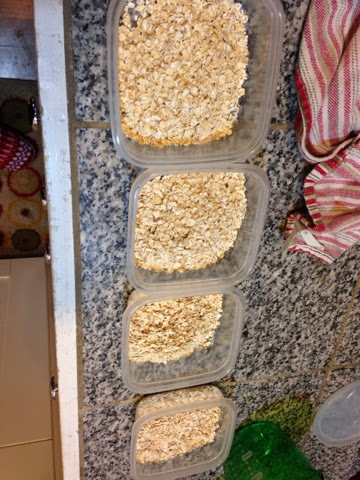
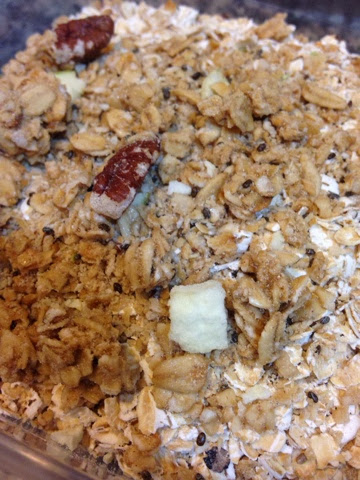
 Well, firstly i made individual oatmeals to go. Each contains a serving of oatmeal, some yummy apple cruch granola mix, and then a small handful of dried berries!


When I add the hot water I mix in a little bit of agave for some extra sweetness, and these treats keep me full for the whole morning! 

Put some healthy snacks out to grab on the go, and lots and lots of fruit! Hopefully it has the desired effect!

On the fitness side of things, yesterday I did a fantastic streching DVD, its part of the turbo fire workout and man is it good! Makes you feel fantasic after, however today I am feeling it! 

I had big plans of putting in an hour of cardio today before work, but, I couldnt pull myself out of bed early enough. I didn't let that stop me though, i spent 20 minutes on the treadmill. I am hoping the more I do it the easier it will get to wake up early and be able to spend more and more time at the gym. 

Here's to hoping!